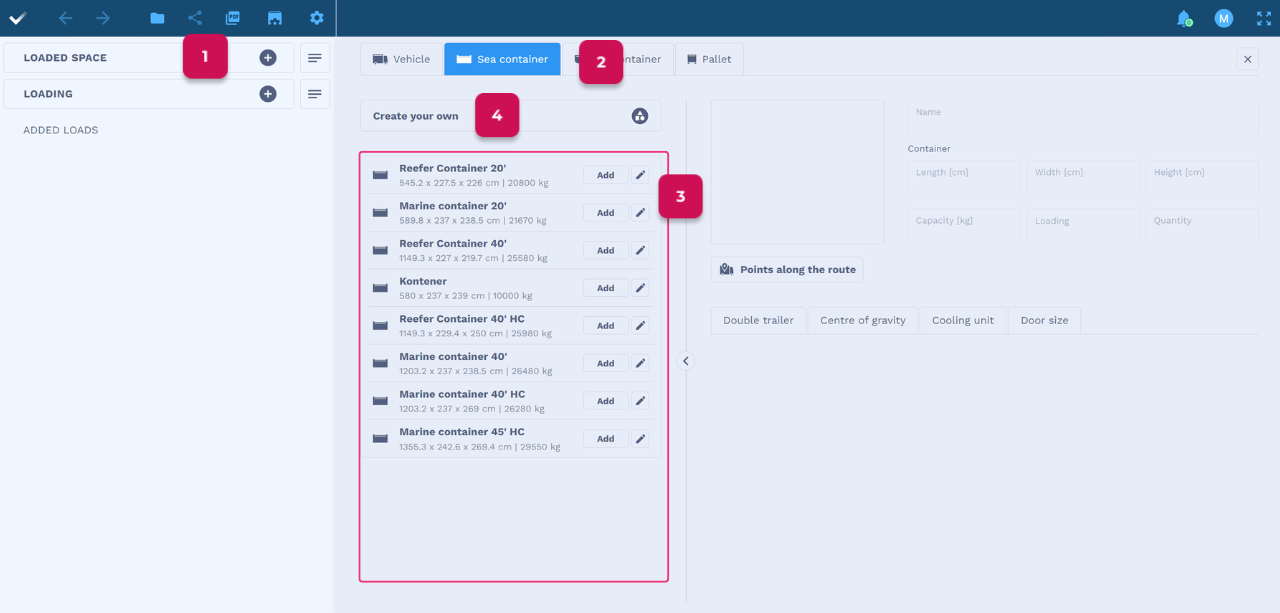
- After entering the application, click on Loaded space to add a sea container to your project.
- In the top panel, select Sea container.
- You can select a container from the list:
– click Add to add it to the project without any changes.
– click the pencil icon to edit the container before adding it to the project.
The list shows sea containers added by default in the application, as well as those saved by the user on their account. - If the quick selection list doesn’t include the spaces you want to work with, you can manually enter their dimensions. Click on Create your own.
- Fill in the name, length, width and height as well as the quantity of containers of this type that should be added to the project.
While creating a container, you can also add its load capacity and specify the loading way – from the right, from the back, from the left, from the top.
Values in the program are given in centimeters and kilograms unless the user changes the units to millimeters or inches and pounds.
When creating a container, you can add points along the route, double trailer, centre of gravity, cooling unit, and door size – we provide detailed information below. - Click Save if you want the loading space to be added to your account and displayed on the quick selection list. You can edit or delete it at any time.
- When you have finished filling in all sea container details, click Add to add the space to the project.
- To delete all the entered data and start entering anew, click on the trash icon.
- By clicking the arrow icon, the system will restore the data to the initially entered values.
If you want to add other loading spaces to the project, simply follow the same process after adding the first one.

Go to the video and see how sea container loading looks in Goodloading:
Check also: